
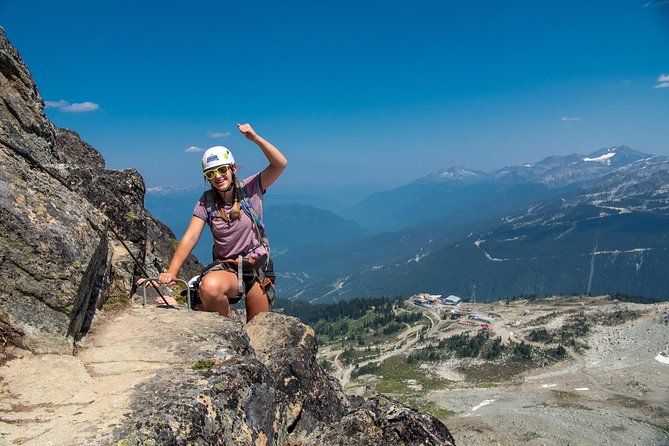
REVIEW · WHISTLER TOURS
Whistler Via Ferrata Tour
Cables, rungs, and Whistler Mountain views. This Whistler via ferrata tour takes you from the gondola to a glacier approach, then up safety cables on moderate terrain with a guide close by in a small group and with safety cables doing their job.
What I love most is how much is handled for you. You get a helmet and harness at the start, and you do not have to track down glacier and climbing gear. I also love the mountain payoff, the Whistler and valley views that keep getting better, plus the feel of working your way up step by step (and yes, there’s a bridge at the top area).
The one drawback to plan for is effort. It is not technical climbing, but it is still hands-on, grip-on-the-rungs work, so you should come with moderate fitness and a willingness to sweat for four hours.
In This Review
- Key things I’d plan around
- Whistler Via Ferrata in plain terms: what you’re really doing
- Your 4 hours on the mountain: how the time is spent
- From Garbo’s Cap Bar to the gondola start: where your morning begins
- Harness and helmet fit: where confidence starts
- The 30 to 45 minute glacier-base hike: building your legs for the rungs
- The short scrambling section before you clip in
- Halfway stop: water, snacks, photos, and a real reset
- Finishing the climb near Whistler Mountain’s peak
- Stop at Whistler Blackcomb: why this location is part of the magic
- What’s included, what’s not, and how to judge the $149.46 value
- What to bring: the stuff that saves your hands and your day
- Guides and safety: why small-group coaching matters
- Morning vs afternoon: when the mountain feels friendliest
- Who should book, and who should think twice
- Should you book the Whistler via ferrata tour with Mountain Skills Academy?
- FAQ
- How long is the Whistler Via Ferrata tour?
- Where do I meet for the tour?
- What time does the tour start?
- Do I need climbing experience to do the tour?
- What equipment is included?
- What do I need to pay for that is not included?
- What should I bring?
- What is the minimum age and group size?
- Is there free cancellation?
Key things I’d plan around
- Small group size (max 6 people) means you get real attention during gear fitting and the climb.
- Harness and helmet included reduce the guesswork before you start moving.
- A glacier-base hike (30 to 45 minutes) builds into the climb, so bring stamina, not just nerves.
- Short scrambling section before clipping in is brief, but it is where most first-timers feel exposed.
- Halfway stop for water, snacks, and photos gives your arms a break before the upper section.
- Peak 2 Peak gondola ticket is required for access, and it is not included in the tour price.
Whistler Via Ferrata in plain terms: what you’re really doing
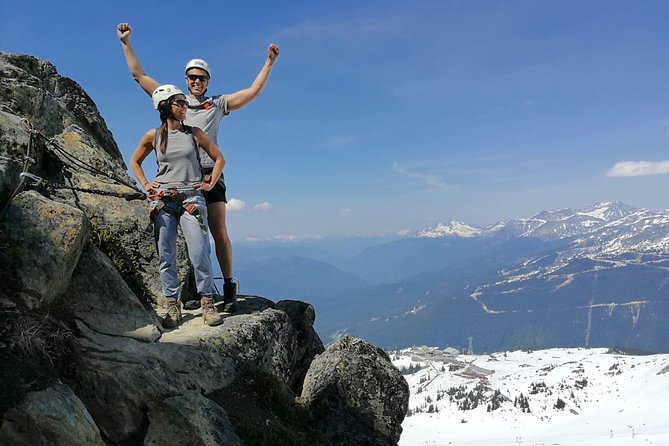
A via ferrata is basically an organized way to experience real alpine climbing without needing prior rope skills. You will hike in, then use fixed cables and rungs to move upward. The system is designed so you stay attached while you climb, and your guide runs the show from the first harness adjustment to the last steps near the top.
This tour is built around Whistler Blackcomb terrain, with your climb starting after a gondola ride up to the launching point. From there, you work through three distinct phases: a glacier-base approach, a short scrambling warmup, and then the main climb on safety lines. The rhythm matters, because it turns what might sound intimidating into a steady, guided progression.
The small-group setup is key. With a maximum of 6 people, the guide can stop to fix fit issues, answer questions fast, and keep an eye on how you are handling the rungs. If you have ever tried to follow a bigger group on a steep trail, you know the difference.
A few more Whistler days to compare
- Zipline Adventure in Whistler
★ 5.0 · 1,367 reviews - Whistler, Sea to Sky Gondola, and Shannon Falls Day Trip
★ 4.8 · 1,134 reviews - Whistler Odyssey Tour: Off-Road Buggy Adventure
★ 5.0 · 750 reviews
Your 4 hours on the mountain: how the time is spent
Plan on about four hours total. The schedule is structured so you are not just rushing uphill. You get time to walk in, learn the technique, climb in sections, then take a breath at the halfway point before finishing near the top.
Also note the tour timing options. You can choose a morning or an afternoon departure. One practical detail from recent experience: the morning session can feel hotter due to sun position, so if you burn fast or sweat easily, think about when you want to tackle the climb.
The flow is simple:
You meet at the starting point, get directed to the gondola portion needed for access, get geared up, hike across the glacier base, then climb up in the main via ferrata section. When you finish, the activity ends back at the meeting point. That matters because you do not have to organize your own return logistics.
From Garbo’s Cap Bar to the gondola start: where your morning begins
Meeting happens at Garbo’s Cap Bar, 4804 Glacier Ln, Whistler, BC V8E 1B9, Canada. The start time listed is 9:00 am, which typically lines up with the morning departure. If you book the afternoon option, your start time will shift, but your meeting point and overall flow stay the same.
Garbo’s is helpful because it gives you a clear, easy anchor point in town. When you are doing a half-day mountain activity, that kind of clarity reduces stress, especially if weather changes your plans.
You should also think about how you will get there. Transportation is not included, so you’ll want to have a plan for getting to that meeting spot on time and ready to move.
Harness and helmet fit: where confidence starts
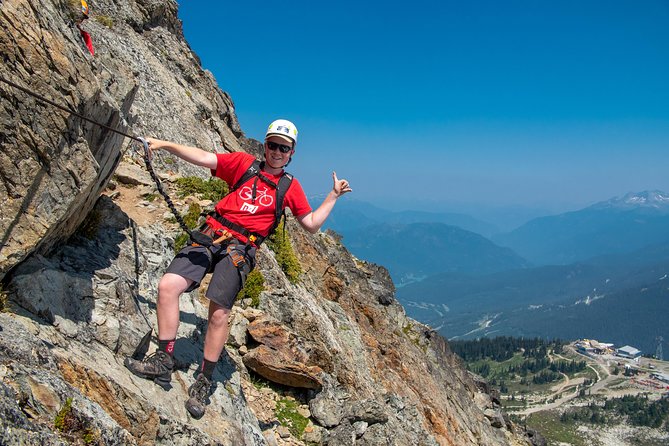
At the top of the gondola, the guide outfits you with a harness and helmet. This is not just about safety gear on, it is about correct fit so you can move comfortably while attached. Expect the guide to show you how the harness setup supports you and how you should behave around the cable system.
If you are wondering about footwear, the tour includes hiking boots if required. If you bring your own shoes, choose something made for traction on rough surfaces. The more secure your footing feels during the hike, the calmer you will be during the climbing portion.
This is also where you get brief technique guidance. You will be stepping and grabbing onto rungs, and the early part of the climb is where your body learns the rhythm. A good fit and clear instructions here pay off later when your hands get tired.
A different day out in Canada:
- Whistler Wilderness Run Snowmobile Tour
★ 5.0 · 724 reviews - Wet and Wild Elaho Exhilarator Rafting
★ 5.0 · 625 reviews - 2 Hour Wilderness Adventure Snowmobile Tour in Whistler
★ 5.0 · 610 reviews - Superfly Ziplines on Cougar Mountain – includes 4 ziplines!
★ 5.0 · 498 reviews
The 30 to 45 minute glacier-base hike: building your legs for the rungs
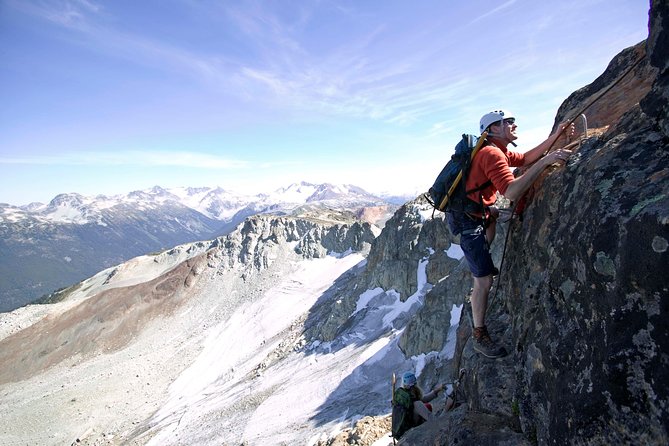
After gearing up, the group hikes for 30 to 45 minutes across the base of the glacier. This walking section matters more than it sounds. It warms you up, settles your pace, and helps you find your rhythm before you start the fixed-cable climb.
You are not scaling vertical rock during this time, but it is still time on uneven ground. If you are coming straight from sightseeing in the village, you will likely feel the hike more than you expect. Bring water and eat a little before you arrive, because you will need energy for the hands-on portion after.
What I’d do if you run cold or get chilled easily: wear layers you can manage. The guides run the tour in all weather conditions, so you might start dry and end in mist or wind.
The short scrambling section before you clip in
Before the main climb, there is a small scrambling section. This is the moment where first-timers often feel exposure even if the difficulty is moderate. The trick is to treat it like a quick transition, not a test.
After that scrambling segment, you clip into the safety cables and begin climbing up. The climbing technique is straightforward: step onto the rungs, grab with your hands, move one controlled section at a time. Your guide stays close and can coach you through posture and hand placement so you do not waste energy.
This is also where people with fear of heights can feel the most nervous. One participant shared that they were dealing with a fear of heights on the gondola approach, but the guide support and the tethered system made them feel safer once they started moving. If you know you get anxious at heights, focus on the next rung, not the view, until you settle.
Halfway stop: water, snacks, photos, and a real reset
Midway up, you stop for water, snacks, and photos. The point is not just photo ops. It gives your grip time to recover and lets everyone re-check their gear and breathing.
You might think the hardest part is the hardest looking part near the top. In reality, the hardest part is often the climb where your arms start to burn and you start rushing. That halfway break is a built-in correction moment. You get a chance to calm down and keep your pace steady.
One practical thing: since snacks and water are not included, have your own ready. Even if you plan to buy something later, do not rely on finding it on the mountain.
Finishing the climb near Whistler Mountain’s peak
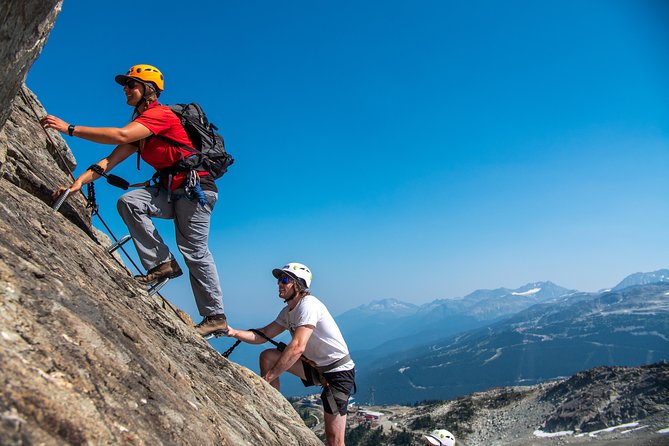
After the halfway stop, you continue climbing up to the peak area of Whistler Mountain. This is where the views stack up. Whistler’s mountains and valleys open out in stages, so you get a gradual payoff rather than a single dramatic moment.
The bridge near the top area is another highlight. Even if you are cautious, it is the kind of feature that turns the climb into an actual alpine moment, not just exercise.
You should expect the last section to feel a bit more intense. By then, your hands have done more work and your legs are ready to stop. That is why a patient guide makes such a difference. In different groups, guides like Maya, Jeremy, Emile, Victor, Rob, and others were praised for keeping people feeling safe, explaining what was happening, and pacing the group so anxiety did not take over.
Stop at Whistler Blackcomb: why this location is part of the magic
The tour is tied to Whistler Blackcomb, which is exactly why the climb feels like it belongs in a place like this. You are not just climbing something random. You are moving through a mountain setting with glacier proximity, classic Whistler views, and a well-known outdoor playground overhead.
There is also a lift ticket requirement that hints at how you use the broader mountain area. The Peak 2 Peak gondola ticket is required for access and not included in your tour price. Once you have that lift ticket, you might be able to use it to extend your time on top after the via ferrata portion, including exploring further areas connected by gondola.
If you plan to spend more time up top, bring extra time buffers. Your energy will be spent, so you might want an easy plan, not another big hike right after the climb.
What’s included, what’s not, and how to judge the $149.46 value
The price is $149.46 per person for about four hours. That cost can feel steep until you see what is wrapped into it.
Included:
- Local professional guide
- Helmet and harness
- All climbing and glacier equipment
- Hiking boots available if required
Not included:
- Peak 2 Peak gondola ticket (required)
- Snacks and water
- Guide gratuity (suggested)
- Transportation
Here is how I think about the value. You are paying for safety systems, specialized gear, and instruction. Equipment plus a trained guide is the expensive part of any climbing-adjacent activity. When those are included, you avoid the two common mistakes people make: showing up without the right gear, or trying to DIY a route that requires the cable setup and expert oversight.
If you already planned to buy gondola access anyway, the remaining cost is largely for the guided via ferrata experience itself. That is why this tour tends to rate so well: it delivers a lot of mountain time plus a real sense of accomplishment, without turning the day into a gear rental and confusion marathon.
What to bring: the stuff that saves your hands and your day
The tour lists simple essentials, and the feedback from participants adds a few smart upgrades.
Bring:
- Hiking shoes
- Gloves
- Small backpack
- Water
- Snacks
- Rain jacket
Two extras I strongly suggest based on real hands-on experience:
- Wear sunscreen, even if the sky looks cloudy. Mountain sun can still catch you.
- Use wool socks if that is your thing. One participant specifically called them out as helpful on this outing.
Gloves deserve their own mention. One person recommended them to prevent calluses from gripping rungs. If you can, choose gloves that let you hold metal comfortably without bunching. You want grip, not thick padding that makes you lose control.
Also, dress for weather. The tour operates in all weather conditions, so you should plan for wind and mist, not just bright sun.
Guides and safety: why small-group coaching matters
A lot of climbing anxiety is not about the difficulty, it is about uncertainty. This is why the guide experience keeps showing up as a major reason people loved the tour.
Different guides have different styles, but the common thread is clarity and encouragement. People praised guides such as:
- Maya for making the excursion feel top-notch and for clear guidance
- Jeremy for supporting a fun, safe climb and keeping the pace manageable
- Emile for keeping people going on an overcast day
- Victor for patience with someone who had a strong fear of heights
- Erica for a positive attitude and confidence building when weather forced an alternate mountain plan
- Theresa for extra support and being helpful when someone needed reassurance behind the guide during snow or traction changes
This matters because the climb is hands-on. You will do best when your guide can explain what to do next, not just tell you to keep moving.
Safety also relies on the fixed-cable system. You clip into safety cables before the main climb, which helps you feel secure as you progress.
Morning vs afternoon: when the mountain feels friendliest
You can choose either a morning or afternoon departure. If you are sensitive to heat, think about the sun angle. One participant noted that the morning tour can be hotter, depending on sun position. That means the afternoon might feel easier for some people, even though you still have to climb hard.
The practical move is to dress in layers and stay hydrated no matter what time you book. Weather can change quickly in the Whistler mountains, and the tour runs in all weather conditions.
If you want the calmest start, morning departures can work well because you are fresh and daylight is strong. If you want a slower mental build, afternoon can feel less rushed. Either way, pack for whatever the sky does.
Who should book, and who should think twice
Best fit:
- You are moderately active and comfortable with physical work for about four hours
- You are a beginner with no climbing experience but still want a real alpine challenge
- You want guided safety and clear instruction rather than DIY climbing
This might be a mismatch if:
- You have very limited mobility or you know gripping rungs is a problem for your hands
- You get overwhelmed by heights even when you are attached to safety cables
- You do not handle cold, wind, or wet weather well, since the tour runs in all conditions
The good news is that multiple people did this as first-timers and still felt proud of what they accomplished. The most important factor is not fear or confidence, it is your willingness to follow the guide’s coaching and pace yourself.
Should you book the Whistler via ferrata tour with Mountain Skills Academy?
If you want a memorable Whistler mountain day that is active, guided, and not overly technical, this is a strong pick. You get real equipment, a small group, and a guide who can keep you safe and moving even when conditions change. The views are a big part of the reward, and the step-by-step climbing makes it feel achievable.
Before you book, do two quick checks:
- Make sure you will handle four hours of effort and the grip work on the rungs.
- Budget for the required Peak 2 Peak gondola ticket, since it is not included.
If those boxes fit you, I’d book it. It is one of the few Whistler activities that turns fear or curiosity into a hands-on win, with help every step of the way.
FAQ
How long is the Whistler Via Ferrata tour?
It runs for about 4 hours.
Where do I meet for the tour?
You meet at Garbo’s Cap Bar, 4804 Glacier Ln, Whistler, BC V8E 1B9, Canada.
What time does the tour start?
The start time listed is 9:00 am. Morning and afternoon departures are available.
Do I need climbing experience to do the tour?
No climbing experience is necessary. It is described as moderate and suitable for beginners.
What equipment is included?
Helmet and harness are included, along with all climbing and glacier equipment. Hiking boots are available if required.
What do I need to pay for that is not included?
A Peak 2 Peak gondola ticket is required and not included. Snacks and water are also not included, and transportation is not included.
What should I bring?
Bring hiking shoes, gloves, a small backpack, water, snacks, and a rain jacket. You should dress for the weather since the tour operates in all conditions.
What is the minimum age and group size?
The minimum age is 12 years. The group is capped at a maximum of 6 people.
Is there free cancellation?
Yes, you can cancel up to 24 hours in advance for a full refund.
Recently listed around Whistler
- Whistler to Vancouver Scenic Seaplane Transfer: One Way★ 5.0 · 4 reviews
- Whistler’s Only Green River Whitewater Rafting★ 5.0 · 161 reviews
- Whistler’s Hidden Gems Tasting Tour – 4 Restaurants 1 Fun Evening★ 5.0 · 86 reviews
- Private Whistler Sightseeing Tour: Discover all of Whistler in Comfort!★ 5.0 · 65 reviews
- Whistler Development Ski Rental Package★ 5.0 · 48 reviews
- Whistler Premium Ski Rental Package★ 5.0 · 55 reviews
- Whistler Sky Walk★ 4.5 · 13 reviews
- Whistler Development Snowboard Rental Package★ 5.0 · 7 reviews
Whistler Tours, compared.
Whistler, Sea to Sky Gondola, and Shannon Falls Day Trip
Read our review →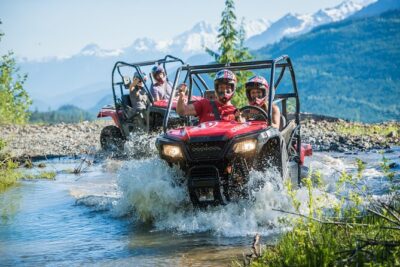
Whistler Odyssey Tour: Off-Road Buggy Adventure
Read our review →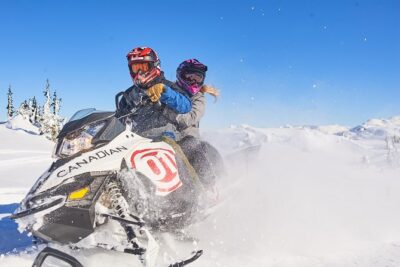
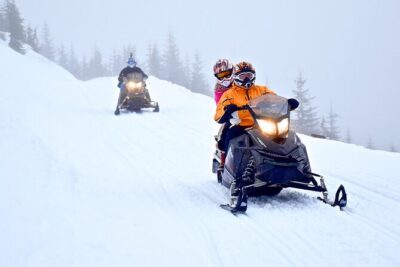
2 Hour Wilderness Adventure Snowmobile Tour in Whistler
Read our review →
Superfly Ziplines on Cougar Mountain – includes 4 ziplines!
Read our review →
Browse the lists this tour appears in